
January 31, 2018
Wedding Photography Editing Workflow
Filed in: Photography Education

When I first started shooting weddings, I would spend hours and hours (and more hours) trying to perfect my images in post-production. I had no idea how to establish a wedding photography editing workflow.
But when you shoot upwards of 25 weddings per year, you need to figure it out fast. I was SO OVER staying up until 1am with my eyes glued to my computer screen. I needed to streamline. Once I did, I cut multiple hours off the time it would take me to get through a single wedding. PLUS, I actually improved the quality of the final images I would deliver to clients.
Less time spent working + better quality product = entrepreneurial happy dance.
Here’s my step-by-step workflow, to help you make better use of your valuable time.
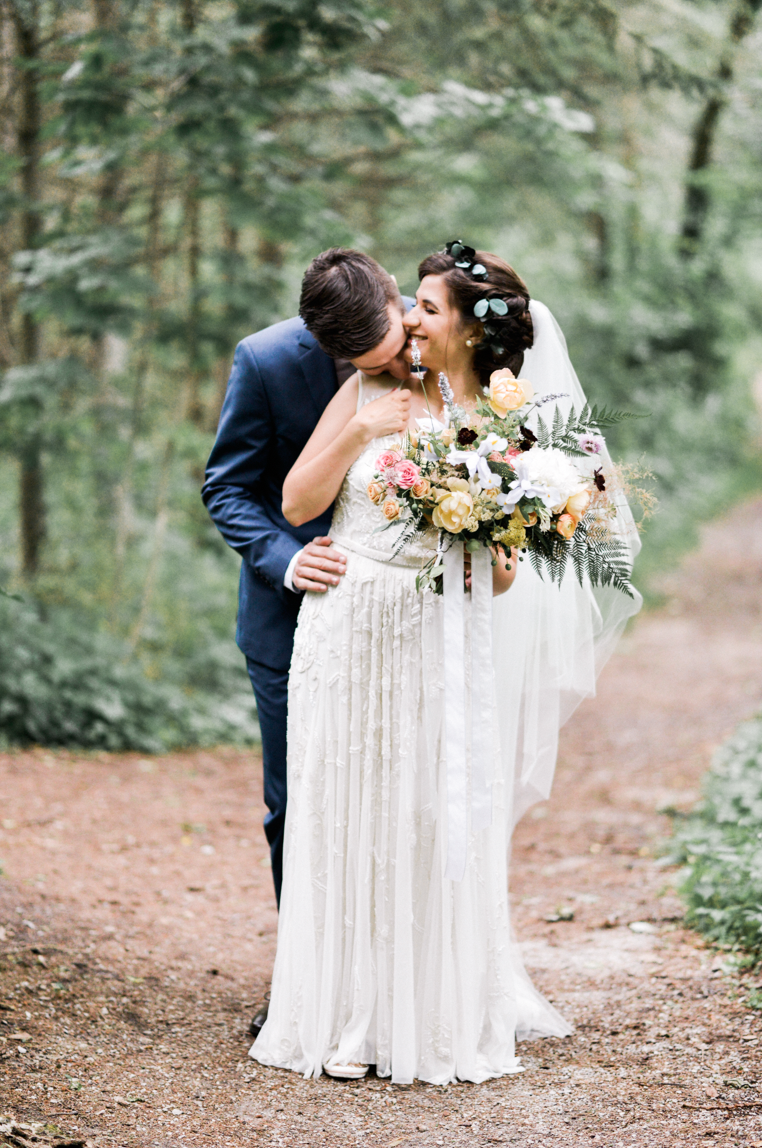
1. Take Fewer Photos to Begin With
In our digital age, we think we can just snap away uncontrollably without care or concern for what it’s costing us. “If I take enough photos, at least one of them will turn out well, right?” I guess so, but it’s far better to develop the eye and the awareness of when an image will work, and when it won’t BEFORE you take it. There’s no reason to sort through loads of sub-par photos when you don’t have to.
You can also downgrade your continuous burst mode settings from 5+ to 3. You’re not shooting race cars going 250 kph, so there’s really no need to snap 7 photos of the same scene.
2. Upload to Lightroom and Back-Up
The vows are said and the cake is cut, and you’re heading home with your images in tow.
I always, without fail, upload the images directly from the card into Adobe Lightroom with 24 hours of the wedding. And often, even sooner. This is to ensure they’re backed up in two places (the cards and my computer).
Then, when I go to my office on Monday I back them up again to another hard drive. This ensures they’re in three different places, with one off-site.
3. Collect Images from Second Shooter
I ask my second shooter to deliver the photos to me within one week. You can opt for them to deliver them in whatever way you like, including WeTransfer, Dropbox, or the old fashioned way, in person.
One MAJOR way you can save yourself time is making sure your second shooter’s cameras have the same time stamp as yours. That way, you don’t need to spend the time manually organizing them chronologically. I’ve learned this the hard way.
4. Flag
This is where your eye as a photographer is key. I often take 2000+ images for an 8 hour day, so getting it down to 700-900 is crucial.
I go through all the images in Lightroom and “flag” the ones I think are worthy of being given to the client. The easiest and fastest way to do this is simply pressing the “tilde” key (right below the escape key) on your keyboard every time you see a shot you like.
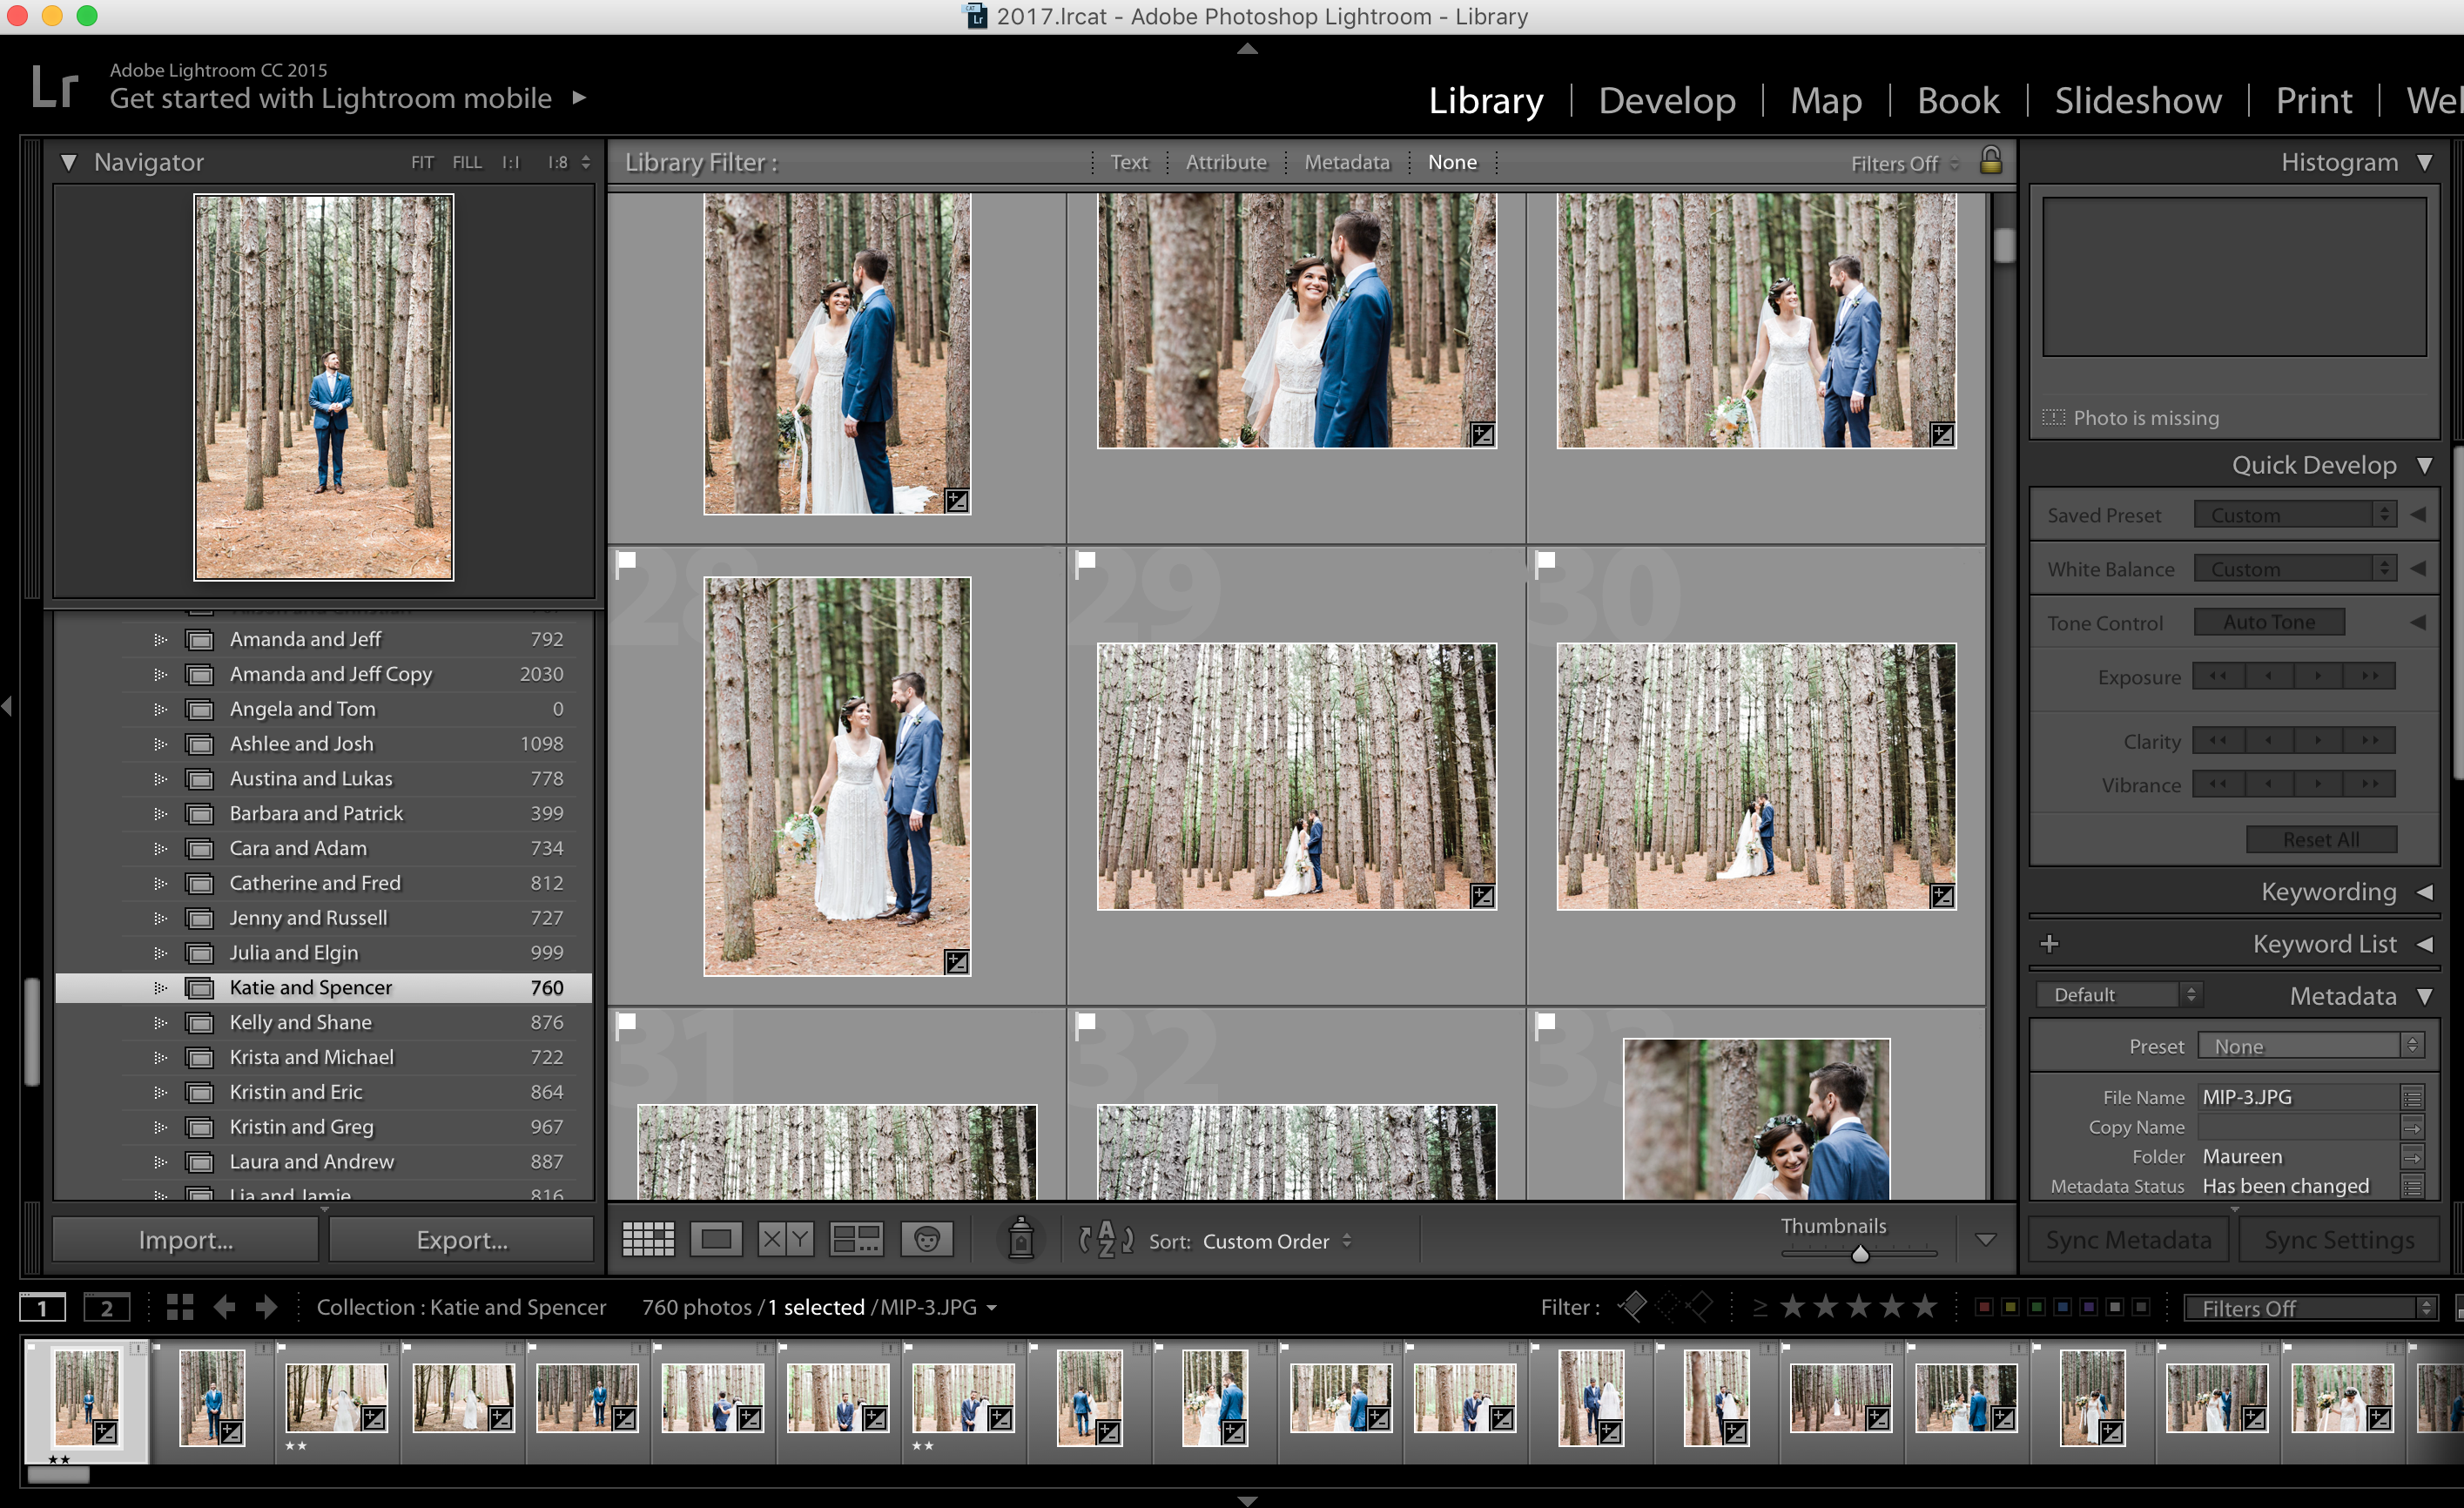
There’s no need to give your client two shots that are basically identical, ones that are blurry or out of focus, or simply, the shots that don’t convey anything beautiful or significant about the day. Your clients only want to see the best, and it’s up to you to recognize which ones those are.
5. Edit – First Round
In order to have a consistent look and feel to all my images, I apply the same custom designed preset to every single one. Then, I go through all of the images and adjust them individually, if need be. Things I adjust for include exposure, white balance, skin tone, crop and levelling.
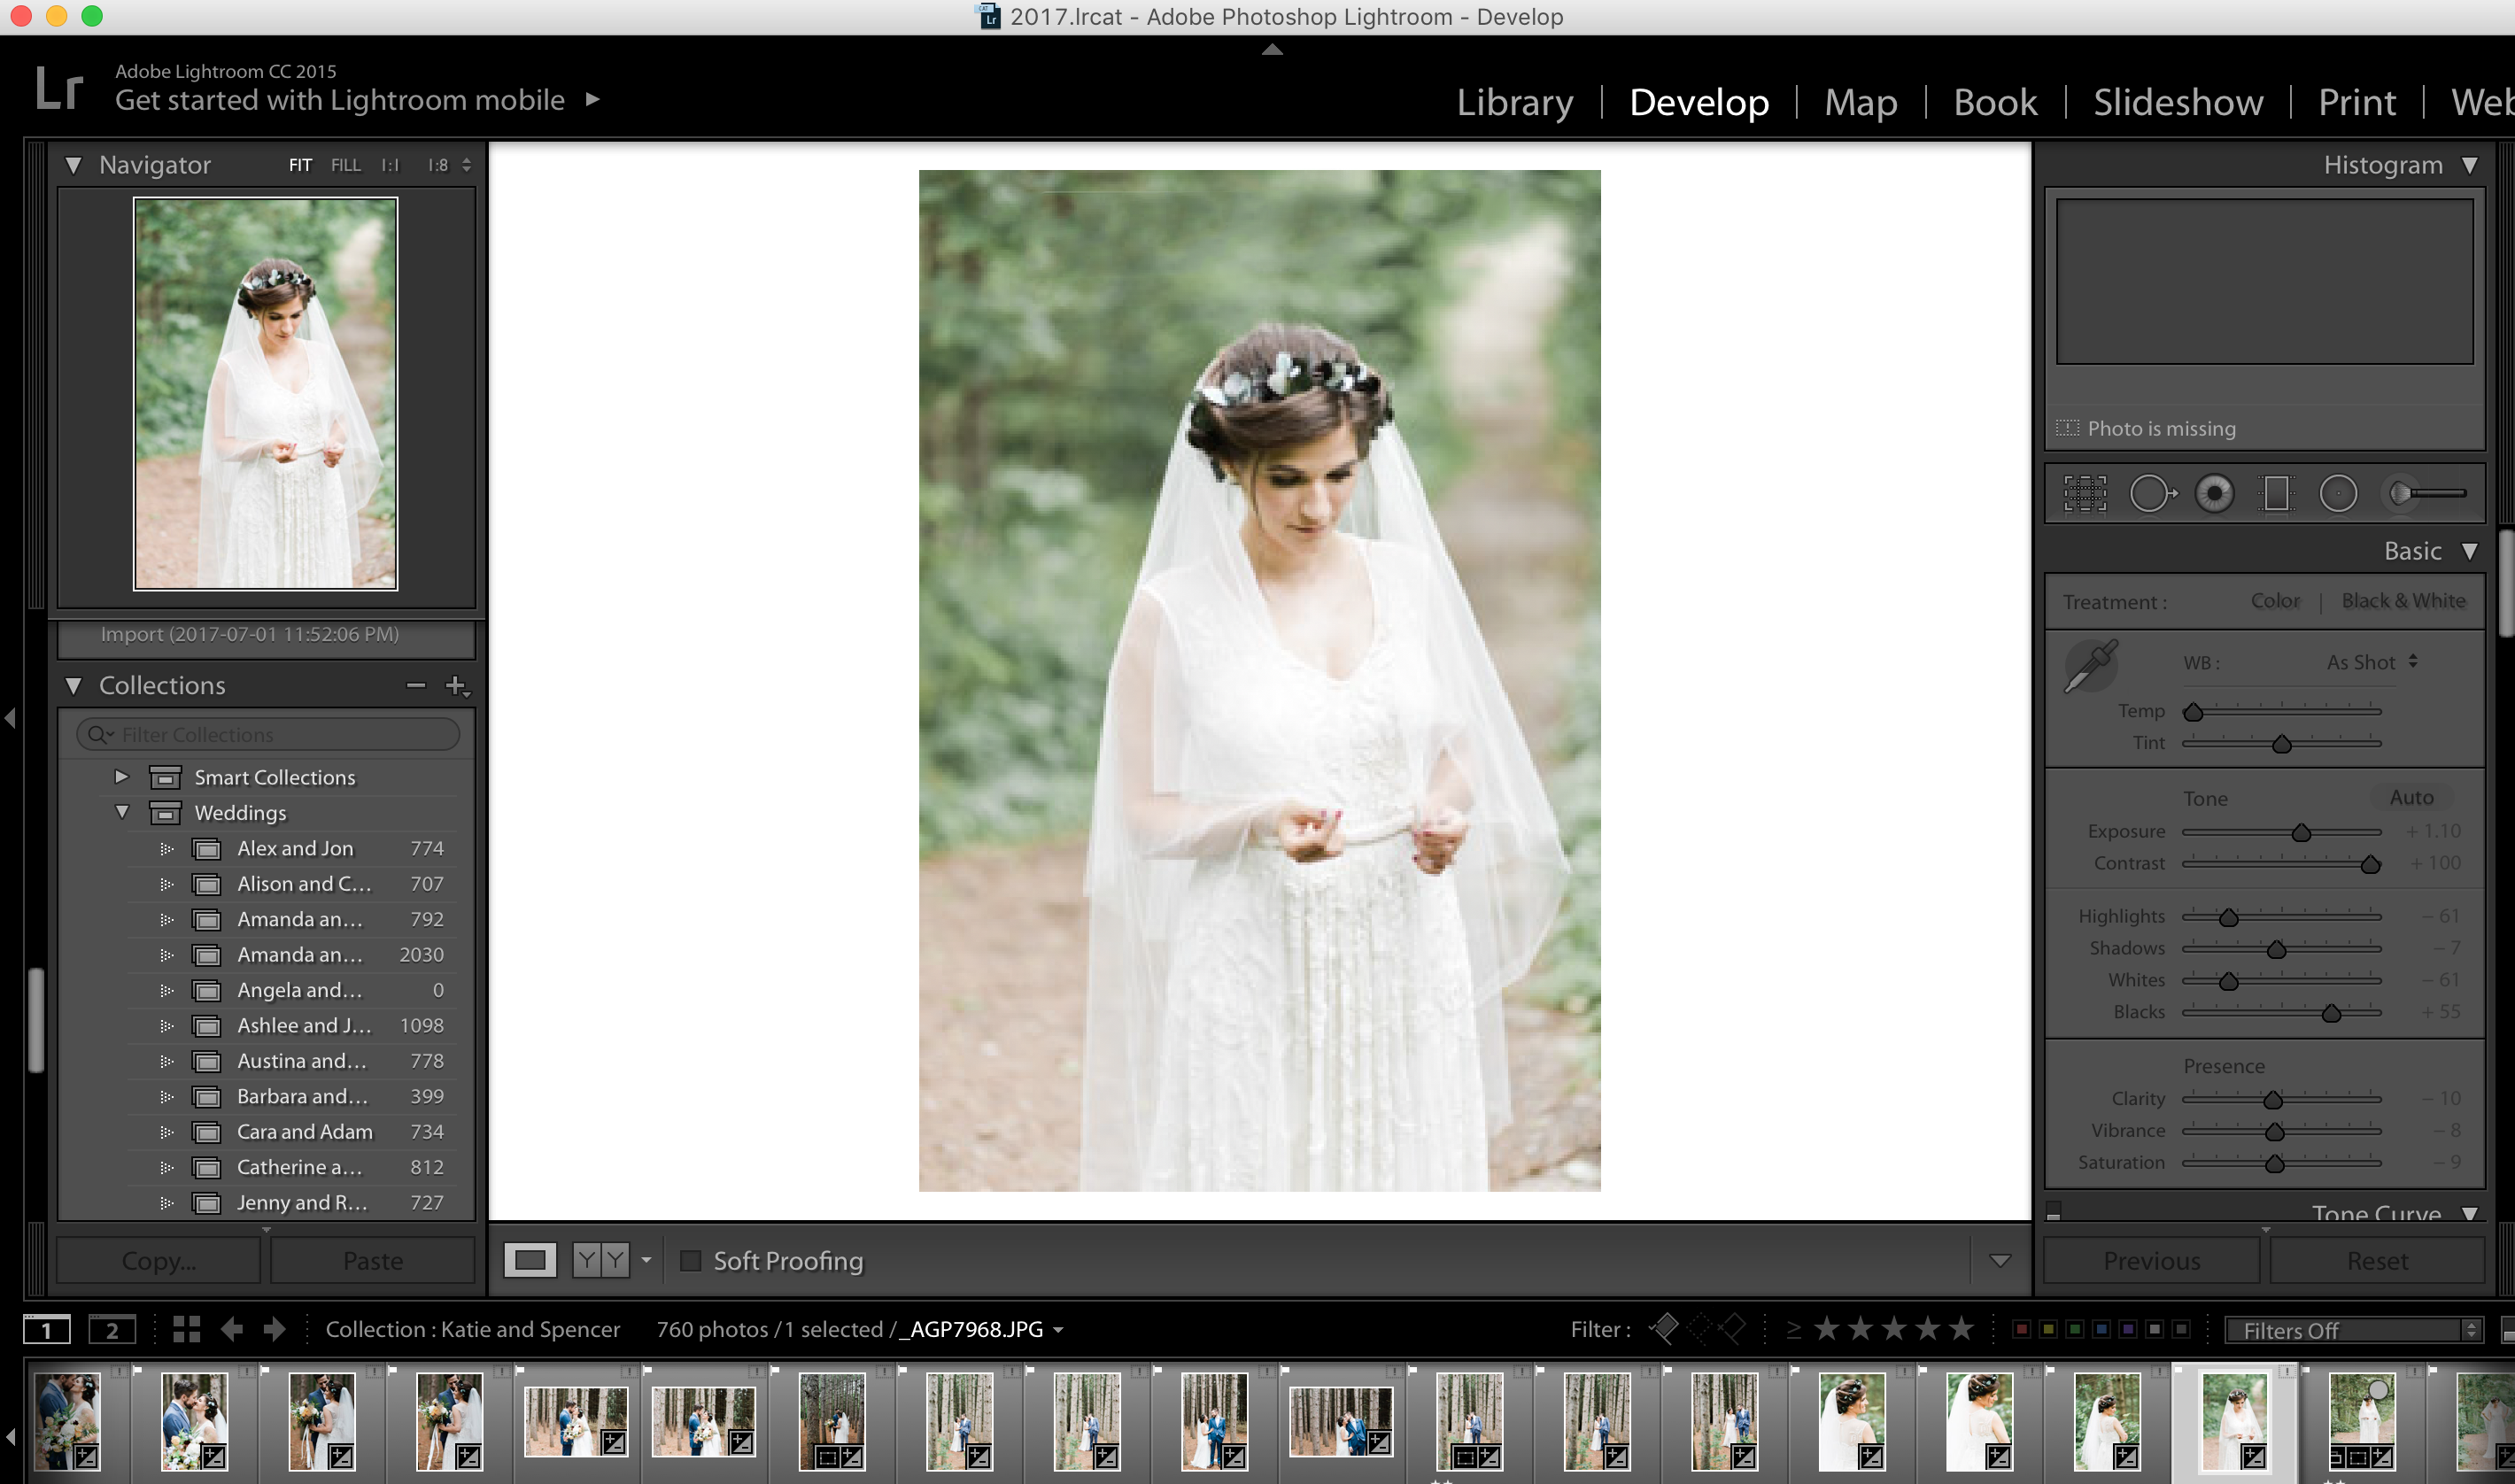
I go for a natural look with my edits, and don’t over-process the images.
6. What about Photoshop?
Ah yes, the eternal question. Do I use Photoshop? The true answer is, “Sometimes, but not if I can avoid it”.
I find Lightroom far better and quicker, however, there are certain things that Photoshop is just better at. A stranger walked through the background of a shot? Your bride had an unfortunate wedding day breakout? Yep, Photoshop will serve you better.
7. The Final Edit
I wait at least a day, and go over everything again in Lightroom. Your eyes are simply fresher and will catch things you may have missed the first time.
8. Export
This is where Lightroom is your best friend. It batch exports and saves every image you will send to your client.
I export everything in Jpeg, at 300 DPI, and I export at the original dimensions.
9. Upload and Send
I use Shootproof as my client viewing and delivery system. You can upload really high res images, they have a gorgeous display system, and it even integrates your print ordering system in a super easy to use, client friendly format.
I usually upload overnight because it takes a while due to the size of the images. And also transfer the same files to a USB.
Then I simply send the gallery and USB to the client! They can view, download, and share with family and friends as they choose.
10. Back Up and Store
Only when the images are uploaded and sent will I delete the originals from the SD card. I move the photos from my computer to an external drive, and always encourage clients to back up in multiple locations as well.
* for tips on how to convert images to black and white click here
comments +
Leave a Reply
on instagram
@alixgould
Follow along for the most recent work, wedding inspo and photography tips.
As always Alix I loved your blog and for me it was so so sooo helpful. I’ve only always used Photoshop didn’t know anything about Lightroom but trying to complete a course right now. Thank you
Grateful for this insightful glimpse into the wedding photography editing workflow. Thanks for sharing your expertise and making the process more accessible for enthusiasts like me
Glad you found it helpful!